Thursday, November 21, 2024
DIY Pallet Shed: Build a Sturdy Shed for Your Garden with Pallets
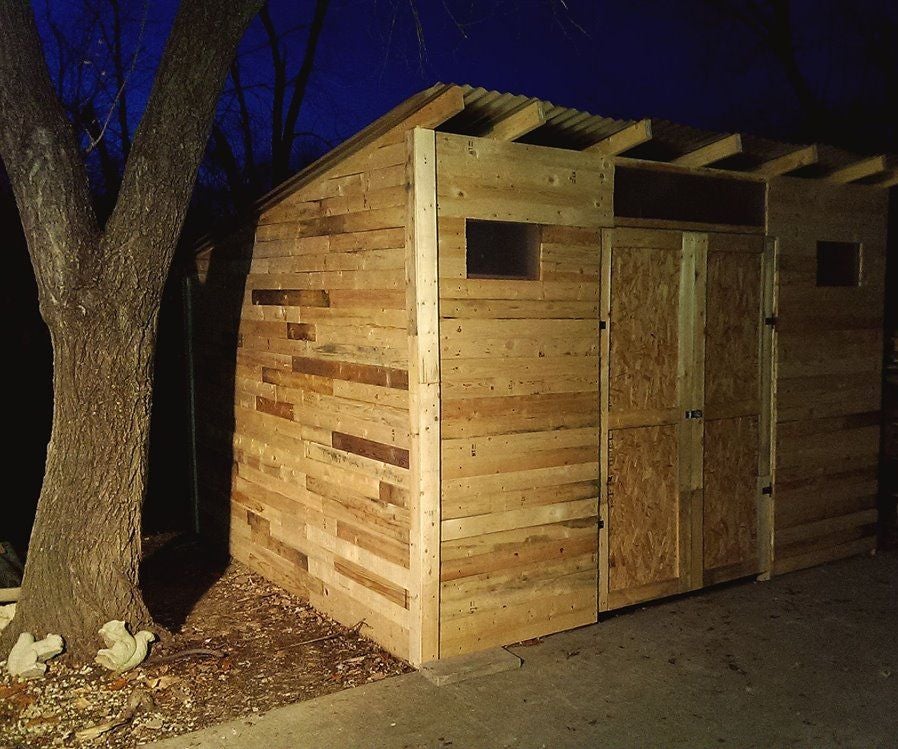
DIY Pallet Shed: Build a Sturdy Shed for Your Garden with Pallets
Hey there, fellow DIY enthusiasts! So you're thinking about building a shed, huh? And you're eyeing those free pallets sitting around? Fantastic! You're in for a treat. Building a shed from reclaimed pallets is a fantastically rewarding project that's surprisingly easier than you might think (and way cheaper than buying a pre-made one!). This guide will walk you through the process, offering tips and tricks to ensure you end up with a sturdy and functional garden shed you'll be proud of.Planning Your Pallet Shed Project
Before you even think about grabbing a hammer, some serious planning is essential. This isn't just slapping some pallets together; we're building something that'll last!Choosing Your Pallets
Not all pallets are created equal. You'll want to carefully select your pallets. Look for:- Heat-treated pallets: These are marked with "HT" and are generally safer to use for construction as they haven't been treated with harmful chemicals.
- Solid wood pallets: Avoid pallets with significant rot, warping, or broken boards. The sturdier the pallets, the sturdier your shed.
- Consistent size: Aim for pallets of a similar size to make construction easier. Measuring several pallets beforehand and choosing similar ones will save headaches down the line.
Designing Your Shed
Think about the size and features you need. How much storage space do you require? Do you need shelves? A workbench? A door? Sketch out a simple plan â€" even a rough drawing on a napkin will help visualize your project. Consider the footprint of your shed and whether you'll need to obtain any permits for its placement (check local regulations). My personal recommendation? Start small. A smaller shed is easier to manage as your first pallet project. You can always build a bigger one later!Gathering Your Materials and Tools
Besides the pallets, you'll need some extra materials:- Wood screws: Lots of them! Different lengths are helpful for different applications.
- Strong wood glue:
- Metal brackets: These will add extra strength to the structure, especially at corners and joints.
- Plywood or OSB (Oriented Strand Board): For the roof and any additional sheeting you might need.
- Roofing material: Tar paper, shingles, or even heavy-duty plastic sheeting will work.
- Door hinges and handle:
- Optional: Paint or stain for weatherproofing and aesthetics.
- Hammer
- Screwdriver (or drill/driver): A drill/driver is a HUGE time-saver.
- Measuring tape
- Level
- Saw (circular saw or hand saw): For cutting pallets and additional wood.
- Safety glasses and work gloves: Always prioritize safety!
Building Your Pallet Shed: Step-by-Step
Okay, let’s get our hands dirty! Remember, this is a general guide; adjust the steps to match your specific design.Constructing the Frame
Start by assembling the base frame. This might involve laying out pallets to create the desired footprint and securing them together using wood screws and glue. Reinforce the corners using metal brackets for extra strength. You'll want your base to be perfectly level! Use a level constantly throughout this stage. No one wants a leaning shed!Adding the Walls
Once the base is solid, it’s time to build the walls. This might involve using additional pallets or constructing walls from individual pallet boards if you want a more finished look. Again, secure everything firmly with screws and glue, reinforcing with metal brackets where necessary.Building the Roof
The roof is a crucial part. You'll need to create a sturdy frame, typically using more pallets or additional lumber. Once the frame is up, you can add your plywood or OSB sheeting and then your chosen roofing material. Ensure the roof has a sufficient slope to allow for water runoff.Installing the Door
Measure, cut, and install your door. This step requires careful measuring and precise cutting. Take your time and make sure it fits perfectly! Attach hinges securely and install the handle.Finishing Touches
Once the main structure is complete, you can add any finishing touches. This might include adding shelves, a workbench, painting or staining the shed, and sealing any exposed wood to protect it from the elements.Tips for Success
- Clean your pallets: Remove any debris, nails, or loose wood before starting construction.
- Pre-drill holes: This prevents the wood from splitting when you screw it together.
- Use plenty of glue: Glue strengthens the joints and makes the structure more durable.
- Check your work regularly: Ensure everything is level and square as you go.
- Don't be afraid to ask for help: If you get stuck, ask a friend or family member for assistance.
Commonly Asked Questions
Q: How long does it take to build a pallet shed?
A: It depends on the size and complexity of your shed, but you can expect to spend anywhere from a weekend to several weekends on the project.
Q: How much does it cost to build a pallet shed?
A: The cost is primarily determined by the additional materials you need (wood screws, brackets, plywood, roofing, etc.) The pallets themselves are usually free or very inexpensive.
Q: Are pallet sheds durable?
A: With proper construction and maintenance (like sealing the wood), a pallet shed can be surprisingly durable and last for many years.
Q: What kind of permits do I need?
A: This depends entirely on your location and local building codes. Check with your local council or planning department before you start building.
Q: Can I use treated pallets?
A: While possible, it's generally recommended to avoid using chemically treated pallets due to potential health hazards. Heat-treated pallets ("HT") are a much safer option.
And there you have it! Building a pallet shed is a rewarding project that combines creativity, resourcefulness, and a good dose of elbow grease. Remember to always prioritize safety, plan carefully, and enjoy the process. Happy building!
Friday, November 15, 2024
12x20 Shed with Loft: A Versatile Backyard Building

12x20 Shed with Loft: A Versatile Backyard Building
Hey there, fellow backyard enthusiasts! Thinking about adding a shed to your property? Well, let me tell you, a 12x20 shed with a loft is seriously game-changing. It's not just extra storage; it's a whole extra space that can transform your outdoor living experience. We're talking about a versatile building that can be adapted to fit your needs, whatever those may be. Let's dive into why this size and configuration is so popular, and what makes it such a smart investment.
The Perfect Size: Why 12x20?
You might be thinking, "12x20? Is that too big? Too small?" The truth is, it's just right for so many people. It’s a great balance between ample space and manageable footprint. Think about it: a 10x12 shed might feel cramped, while anything much larger could start to feel overwhelming, especially if you’re on a smaller property.
The 12x20 dimensions provide enough floor space for a variety of uses. You can easily fit lawnmowers, gardening tools, bicycles, and other bulky items without feeling like you’re playing Tetris to find a spot. And let's not forget the real star of the show: the loft!
The Loft: A World of Possibilities
This is where things get really exciting. That loft space opens up a whole new level of versatility. It’s not just about stacking boxes higher; it’s about creating a functional and often surprisingly spacious area. Here are some ideas to spark your imagination:
- Extra Storage: The obvious choice, and a great one! The loft is perfect for storing less frequently used items, keeping them off the main floor and maximizing your usable space.
- Workshop: If you’re a DIY enthusiast, the loft could become your personal workshop. Imagine having a dedicated space for woodworking, crafting, or repairing items, all protected from the elements.
- Home Office/Studio: With a little creativity (and perhaps some insulation!), the loft could become a quiet and inspiring workspace. Imagine working remotely with a view of your garden.
- Guest Room/Sleeping Quarters: For those unexpected overnight guests, a loft can be converted into a cozy sleeping area. Adding a comfortable mattress and some thoughtful décor can turn it into a surprisingly comfortable space.
- Storage for Seasonal Items: Keep those Christmas decorations, summer clothes, or camping gear neatly tucked away until you need them.
The possibilities truly are endless! The key is to plan carefully and think about how you want to use the space.
Building Materials and Considerations
When choosing materials for your 12x20 shed with loft, you have a few options. Consider your budget and the overall aesthetic you’re aiming for:
- Wood: A classic and aesthetically pleasing choice. Wood sheds can be painted or stained to match your home's style.
- Metal: Metal sheds are durable, low-maintenance, and often more affordable than wood. They are also resistant to pests and rot.
- Vinyl: Vinyl sheds offer a similar low-maintenance appeal to metal, with a more aesthetically pleasing finish.
Remember to consider things like:
- Foundation: A solid foundation is crucial for longevity and stability. Options include concrete, gravel, or a wooden base.
- Roofing: Asphalt shingles are a common and affordable choice, but you can also explore metal roofing for added durability.
- Insulation: If you plan on using the loft as a workspace or guest room, proper insulation is a must to maintain a comfortable temperature year-round.
- Windows and Doors: Strategically placed windows can enhance natural light and ventilation. Choose durable and secure doors.
The Cost Factor: What to Expect
The cost of a 12x20 shed with a loft can vary widely depending on the materials, features, and whether you build it yourself or hire a contractor. Expect to spend anywhere from a few thousand dollars for a basic model to tens of thousands for a fully customized, high-end structure. Doing some research and getting multiple quotes is key.
Permits and Regulations
Before you start building, it’s crucial to check with your local government for any permits or regulations that apply to shed construction. These requirements can vary depending on your location, the size of the shed, and its intended use. Ignoring these regulations could lead to fines or even be forced to dismantle your shed.
Maintenance and Care
Like any structure, your 12x20 shed with loft will require regular maintenance to keep it in top condition. Regular cleaning, occasional painting or staining (if applicable), and periodic inspections for any damage are essential.
Frequently Asked Questions
Here are some common questions people have about 12x20 sheds with lofts:
Q: How much weight can a 12x20 shed loft hold?
A: The weight capacity of a loft depends on its construction. It's always best to consult with a builder or engineer to determine the safe weight limit for your specific shed. Generally, you should avoid placing excessively heavy items in the loft.
Q: Do I need planning permission for a 12x20 shed?
A: Planning permission requirements vary by location. Check with your local council or planning authority to determine if you need permission for your specific project.
Q: Can I build a 12x20 shed with a loft myself?
A: It's possible, but it requires considerable DIY skills and experience. If you're unsure, hiring a professional builder is always a safer option.
Q: How much does it cost to build a 12x20 shed with a loft?
A: Costs vary significantly depending on materials, location, and labor. Get multiple quotes from builders to get a better understanding of the cost in your area.
Q: What kind of foundation do I need for a 12x20 shed with a loft?
A: A solid foundation is essential. Options include concrete slabs, gravel bases, or pressure-treated wooden foundations. The best option depends on your soil conditions and budget.
I hope this has given you a good overview of the benefits and considerations of a 12x20 shed with a loft. It truly is a versatile structure that can significantly enhance your property and lifestyle! Happy building!
Monday, November 11, 2024
DIY Pole Barn: How to Create a Low-Cost, High-Quality Building
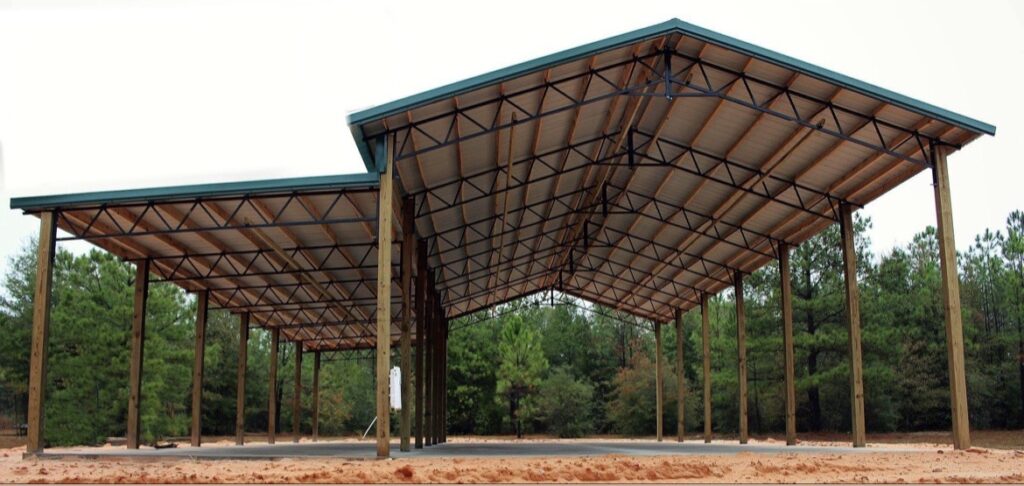
A pole barn, also known as a post-frame building, offers a versatile and cost-effective solution for a variety of purposes, including storage, workshops, garages, and even living spaces. The construction method, relying on sturdy posts embedded in concrete and a lightweight, pre-engineered frame, allows for a quick build with a minimal need for specialized labor. This guide will delve into the comprehensive process of building a DIY pole barn, equipping you with the knowledge and resources to create a durable and high-quality structure within your budget.
I. Planning & Preparation
1. Design & Planning:
Purpose: Clearly define the purpose of your pole barn. This will dictate the necessary dimensions, features, and materials.
Building Codes: Consult local building codes to ensure your project complies with regulations.
Site Analysis: Determine the ideal location on your property, considering factors like drainage, sunlight, and accessibility.
Design & Layout: Sketch your desired layout, including the dimensions of walls, doors, windows, and any other features. Consider the placement of electrical outlets, plumbing, and ventilation.
Permitting: Obtain necessary permits from local authorities before beginning construction.
2. Materials & Tools:
Foundation & Posts: Concrete footings and pressure-treated lumber for the posts.
Frame & Roof: Engineered trusses, plywood sheathing, and roofing materials.
Walls & Siding: Choose from various options like OSB, plywood, or metal siding.
Windows & Doors: Select suitable sizes and styles for your design.
Insulation & Vapor Barrier: Consider adding insulation and a vapor barrier for energy efficiency.
Hardware & Fasteners: Include screws, nails, brackets, and other essential hardware.
Tools: Basic tools like hammers, saws, screwdrivers, drills, levels, and measuring tapes are essential.
II. Construction Process:
1. Foundation:
Excavation: Dig holes for the concrete footings, ensuring they are deep enough to reach frost-free soil.
Forms: Build forms around the holes to create the desired footing dimensions.
Rebar: Install rebar within the forms for reinforcement.
Concrete Pouring: Carefully pour concrete into the forms, ensuring it is properly compacted.
Curing: Allow the concrete to cure properly before proceeding to the next step.
2. Post Installation:
Post Preparation: Cut and treat the post lumber with a sealant to prevent rot.
Setting Posts: Position the posts in the concrete footings and ensure they are plumb and level.
Temporary Bracing: Brace the posts with temporary supports until the concrete fully cures.
3. Framing:
Truss Installation: Raise and secure the pre-engineered trusses to the posts, creating the roof frame.
Wall Sheathing: Attach plywood or OSB sheathing to the posts, creating a solid wall structure.
Window & Door Openings: Cut openings in the sheathing for windows and doors.
4. Roofing:
Roof Sheathing: Install plywood or OSB sheathing on top of the trusses.
Underlayment: Lay down felt underlayment for water resistance.
Roofing Shingles: Install your chosen roofing material, following manufacturer instructions.
Venting: Install roof vents to ensure proper ventilation and prevent moisture buildup.
5. Siding & Finishing:
Siding Installation: Apply your chosen siding material, adhering to manufacturer guidelines.
Windows & Doors: Install windows and doors, ensuring proper sealing and weatherproofing.
Interior Finishing: Finish the interior walls with drywall, paint, or other desired materials.
Electrical & Plumbing: Install electrical wiring and plumbing fixtures as needed.
III. Cost-Saving Strategies:
DIY Labor: By doing most of the work yourself, you can significantly reduce labor costs.
Material Sourcing: Shop around for the best prices on materials, considering bulk purchases and sales.
Basic Design: Opt for a simple design with fewer features to minimize material requirements.
Recycled Materials: Consider using recycled materials for certain components like siding or roofing.
Alternative Insulation: Explore affordable insulation options like fiberglass batts or blown-in cellulose.
IV. Quality Considerations:
Foundation & Posts: Choose high-quality concrete and pressure-treated lumber for a long-lasting structure.
Trusses: Ensure your trusses are designed and engineered by a qualified professional.
Roofing & Siding: Invest in durable and weather-resistant roofing and siding materials.
Proper Ventilation: Implement proper ventilation throughout the structure to prevent moisture buildup.
Maintenance: Regular maintenance is crucial for preserving the longevity and quality of your pole barn.
V. Additional Considerations:
Accessibility: Plan for accessibility features if your pole barn will be used for storage or as a workshop.
Climate: Consider your local climate when selecting materials and designing your pole barn for optimal performance.
Future Expansion: Plan for the possibility of future expansion by leaving room for additional posts or bays.
VI. Conclusion:
Building a DIY pole barn can be a rewarding experience, allowing you to customize your space to your specific needs and budget. By carefully planning, sourcing materials wisely, and adhering to proper construction techniques, you can create a durable, high-quality structure that will serve you for years to come.
Remember, safety should always be a top priority. Wear proper safety gear and follow manufacturer guidelines for all tools and materials. Seek professional guidance when necessary, and don't hesitate to ask for help from experienced individuals. With dedication and proper planning, you can successfully build a DIY pole barn that meets your unique requirements and becomes a valuable asset to your property.
How to Design a Pole Barn with a Natural Wood Aesthetic

Pole barns, with their straightforward construction and adaptable design, have long been a favorite choice for homeowners seeking functional and durable structures. But beyond practicality, pole barns offer a unique opportunity to embrace the beauty of natural materials, crafting spaces that resonate with warmth and rustic charm. Designing a pole barn with a natural wood aesthetic requires a meticulous approach, blending structural integrity with the elegance of unadulterated wood.
Foundation and Framing: The Essence of Strength and Simplicity
The foundation of a natural wood pole barn lies in its sturdy, exposed posts. Choosing the right timber is paramount. Reclaimed timbers, with their rich patina and history, impart a timeless elegance. Alternatively, new timbers like Douglas fir, cedar, or pine offer durability and a natural beauty that can be enhanced with oil finishes. The posts should be carefully chosen for their straightness and uniformity, creating a foundation of architectural grace.
The roof trusses, ideally constructed from exposed timber beams, become an integral part of the aesthetic. Consider using heavy timber trusses, showcasing the grain and knots of the wood. They offer a sense of rustic grandeur, adding a captivating element to the overall design.
Walls: Embracing the Natural Texture
The walls of a pole barn present a canvas for showcasing the beauty of wood. Several options exist:
Traditional Siding: Vertical or horizontal wood siding, whether rough-sawn or smooth-planed, provides a classic rustic look. Choose a natural wood stain or paint to accentuate the grain and texture.
Shiplap Siding: Shiplap offers a timeless and visually appealing aesthetic, with its overlapping boards creating a textured and inviting surface.
Board and Batten: This traditional siding method utilizes vertical boards with narrow battens covering the gaps, creating a distinctive and elegant look.
Roof: A Capstone of Natural Elegance
The roof, a defining feature of any pole barn, provides an opportunity to accentuate the natural wood theme. A standing seam metal roof, in a dark color that complements the wood, offers durability and a sleek modern aesthetic. Alternatively, a traditional wood shingle roof, with its inherent rustic charm, offers a more traditional look.
Windows and Doors: Framing Views and Welcoming Entrances
Windows and doors are critical design elements, framing views and welcoming guests. Large windows, ideally with a rustic charm, allow ample natural light to flood the interior. Consider using salvaged windows with panes of frosted or patterned glass for a unique and vintage touch.
Doors, crafted from solid wood with simple hardware, should complement the overall rustic theme. A double Dutch door, with its charming design and practicality, adds a touch of elegance.
Interior Design: Embracing Rustic Charm
The interior of a natural wood pole barn should be a reflection of the rustic aesthetic established on the exterior.
Flooring: Hardwood flooring, especially reclaimed barn wood or wide-plank oak, provides a warm and inviting surface. Concrete floors, stained with natural tones, can add a modern industrial touch.
Walls: Exposed beams and wood walls, finished with a natural wood stain or clear coat, create a welcoming and inviting atmosphere.
Lighting: Natural light should be maximized, but strategically placed pendant lights or wall sconces, crafted from reclaimed wood or metal, can add a touch of rustic charm.
Furniture: Choose rustic furniture made from reclaimed wood, handcrafted leather, or metal with a weathered patina.
Sustainability: A Commitment to Nature
A key principle in designing a natural wood pole barn is incorporating sustainable practices. Choose locally sourced lumber, minimizing the environmental impact of transportation. Explore using reclaimed wood, giving old timbers a second life and reducing waste.
The Art of Finishing Touches: Enhancing the Natural Beauty
The finishing touches are crucial in creating a cohesive and elegant design.
Natural Wood Stains: Use stains that enhance the natural beauty of the wood, highlighting the grain and knots.
Weathering and Patina: Allowing wood to age naturally, developing a soft patina, adds character and depth to the design.
Hardware: Choose simple, rustic hardware that complements the natural wood aesthetic.
Conclusion: A Haven of Natural Beauty
Designing a pole barn with a natural wood aesthetic is more than simply choosing materials. It's about embracing the inherent beauty of nature and crafting a space that is both functional and visually captivating. By carefully selecting materials, embracing sustainable practices, and adding thoughtful design touches, a pole barn can become a haven of rustic charm, a testament to the enduring beauty of nature and the art of traditional craftsmanship.
DIY Guide to Building a Pole Barn for Farm Use and Livestock Care
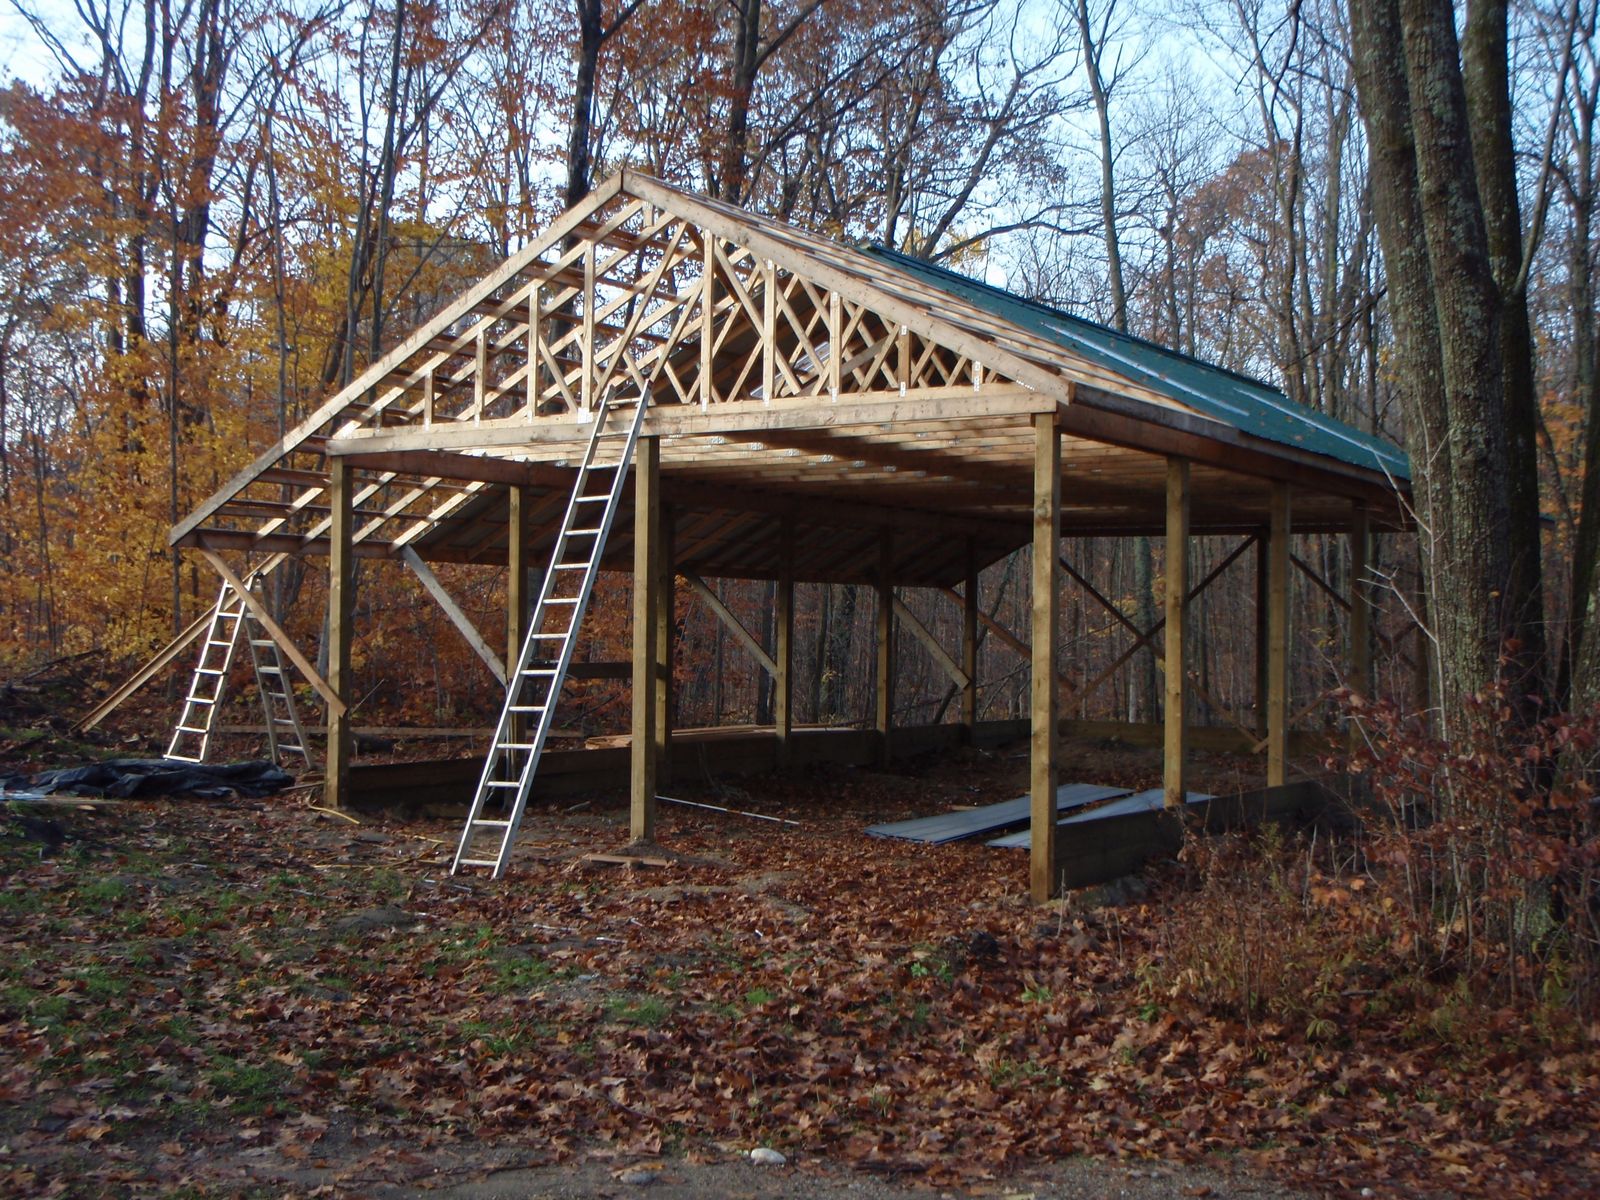
A pole barn, also known as a post-frame building, offers a versatile and cost-effective solution for various farm needs, from livestock housing and equipment storage to workshops and hay storage. Building your own pole barn can be a rewarding experience, allowing you to tailor the structure to your specific requirements and save on construction costs. This comprehensive guide outlines the steps involved in designing, planning, and constructing a pole barn suitable for farm use and livestock care.
1. Planning and Design:
a) Determining Your Needs:
Purpose: Define the primary purpose of your pole barn. Is it for housing livestock, storing equipment, or a combination of both?
Size: Estimate the necessary square footage based on your intended use. Consider the number of animals, equipment storage needs, and future expansion potential.
Location: Choose a suitable location on your property, considering access, drainage, and proximity to utilities.
Building Codes: Consult with your local building department to understand zoning regulations, setback requirements, and any specific building codes.
b) Design Considerations:
Foundation: Post-frame buildings are typically supported by concrete piers embedded in the ground. Consider the soil conditions and frost line to ensure adequate foundation stability.
Framing: Pole barns rely on large-diameter, pressure-treated poles (typically 6x6 or 8x8) to support the roof and walls. The spacing and size of the poles will depend on the building’s size and snow load.
Roofing: Choose a roofing system that meets your budget and climate. Metal roofing is popular due to its durability, longevity, and low maintenance requirements.
Siding: Consider siding options that are weather-resistant and aesthetically pleasing, such as metal siding, vinyl siding, or wood siding.
Doors and Windows: Select doors and windows that provide adequate ventilation and access while minimizing energy loss.
Ventilation: Proper ventilation is crucial for livestock housing. Consider installing ridge vents, gable vents, or fan systems to ensure adequate airflow.
Insulation: If temperature control is a concern, consider adding insulation to the walls and roof.
2. Obtaining Permits and Materials:
Building Permit: Submit your plans to the local building department for approval.
Materials: Obtain a detailed materials list from your chosen supplier. This should include:
Poles: Pressure-treated timber, typically 6x6 or 8x8, depending on size and snow load.
Concrete: For piers and footing.
Roofing: Metal panels, sheathing, and underlayment.
Siding: Metal, vinyl, or wood siding panels.
Doors and Windows: Choose materials and sizes based on your needs.
Fasteners: Structural screws, nails, bolts, and clips.
Other Materials: Hardware, insulation, flashing, trim, etc.
3. Site Preparation:
Clear the Site: Remove any trees, vegetation, or debris from the designated building area.
Leveling: Use a laser level or a surveyor's transit to accurately level the site.
Excavation: Dig holes for the concrete piers, ensuring adequate depth based on frost line and local building codes.
4. Foundation Construction:
Concrete Piers: Pour concrete into the excavated holes, ensuring proper reinforcement and compaction. Allow the concrete to cure according to manufacturer recommendations.
Anchor Bolts: Install anchor bolts in the concrete piers to secure the poles.
5. Pole Installation:
Erecting the Poles: Carefully lift the poles into place, ensuring they are plumb and aligned with the anchor bolts.
Securing the Poles: Bolt the poles to the anchor bolts and temporarily brace them until the roof is installed.
6. Roof Framing and Sheathing:
Roof Trusses: Install prefabricated roof trusses or construct custom trusses on site.
Sheathing: Attach plywood or OSB sheathing to the roof trusses to create a solid surface for the roofing.
7. Roofing Installation:
Underlayment: Install a waterproof underlayment over the sheathing.
Roofing Panels: Secure the metal roofing panels to the sheathing, overlapping them according to manufacturer instructions.
8. Wall Framing and Siding:
Wall Studs: Install wall studs between the poles, using pressure-treated lumber for the bottom plate.
Siding: Attach the chosen siding material to the wall studs.
9. Doors and Windows:
Installation: Install the doors and windows according to manufacturer instructions, ensuring proper weather sealing.
10. Interior Finishes:
Floor: Install a suitable flooring material, such as concrete, wood, or composite decking.
Interior Walls: Consider adding insulation, drywall, or other finishes to improve aesthetics and thermal performance.
Electrical Wiring: Hire a qualified electrician to install electrical wiring and fixtures.
11. Final Touches:
Painting or Staining: Apply paint or stain to the exterior and interior surfaces, as desired.
Gutter and Downspouts: Install gutters and downspouts to direct rainwater away from the foundation.
Landscaping: Landscaping around the pole barn can enhance aesthetics and protect the foundation from erosion.
12. Livestock Care Considerations:
Ventilation: Ensure adequate ventilation to prevent moisture build-up and maintain a healthy environment for livestock.
Lighting: Install sufficient lighting for visibility and animal well-being.
Water and Feed Systems: Install appropriate water and feed systems based on the type and number of animals.
Manure Management: Plan for a system to remove and dispose of animal waste.
Safety: Consider safety measures for both humans and livestock, such as fencing, gates, and secure storage of hazardous materials.
13. Resources and Support:
Building Codes: Consult with your local building department for specific codes and regulations.
Professional Contractors: Consider hiring a qualified contractor for specific tasks, such as foundation work, electrical wiring, or roofing installation.
Pole Barn Manufacturers: Many companies specialize in pole barn construction and can provide design assistance, materials, and installation services.
Farm Supply Stores: Purchase materials and supplies from reputable farm supply stores.
Conclusion:
Building a pole barn for farm use and livestock care requires careful planning, design, and execution. By following this comprehensive guide, you can ensure a successful construction project that provides a durable and functional structure for your farm needs. Remember to consult with professionals, follow local building codes, and prioritize safety throughout the construction process. With proper attention to detail, you can create a pole barn that will serve your farm for years to come.
How to Build a Pole Barn with a Durable Metal Roof

Alright, you want to build a pole barn with a metal roof, huh? You've come to the right place! Building a pole barn is a great way to get some extra storage space, a workshop, or even a garage. And if you want a roof that's gonna last, metal is the way to go! It's strong, durable, and can stand up to all kinds of weather.
First things first, let's talk about planning. Building a pole barn is a pretty big project, so you'll need to get your ducks in a row before you start.
Figure out the size and shape: What are you gonna use this barn for? How much stuff do you need to store? Do you need a big, open space or something more compartmentalized? Once you know what you need, you can start drawing up some plans.
Choose a location: Make sure it's a level spot with good drainage. Also, consider the wind direction and any potential snow loads.
Get the necessary permits: Depending on where you live, you might need a building permit. Don't be a rebel â€" check with your local authorities before you start digging. It's better to be safe than sorry, trust me.
Gather your materials: You'll need concrete, lumber, metal roofing panels, fasteners, and all the usual tools for building a structure.
Now let's dive into the actual construction:
1. Prepare the site: Start by clearing the area and marking out the footprint of your barn. You'll need to dig post holes for your poles, and you'll need to make sure those holes are deep enough to support the weight of the barn.
2. Set the poles: You'll be using treated lumber for the poles, and they'll be set into the concrete. Make sure the poles are plumb and level, and that they're spaced according to your plans. Once the poles are set, you can pour concrete to secure them.
3. Build the frame: This part is where you start to see your barn take shape! You'll be using lumber to connect the poles and create the walls and roof. Make sure your framing is strong and secure.
4. Sheathing and roofing: Now it's time for the metal roofing! First, you'll need to install sheathing, which acts as a base for the roofing panels. Make sure you use the right type of sheathing for metal roofing â€" plywood or OSB is usually a good choice.
5. Install the metal roof: Now for the fun part! There are different types of metal roofing, like standing seam, corrugated, and metal shingles. You'll need to choose the type that's best for your climate and budget. And remember, you'll need to install a felt underlayment before you put down the metal panels. This will help with waterproofing and soundproofing.
Here's a breakdown of different metal roofing types:
Standing Seam: This is a popular choice for pole barns. It's strong, durable, and has a sleek, modern look. The panels are installed vertically with interlocking seams that create a tight seal.
Corrugated: This is another classic choice for pole barns. It's very durable and cost-effective. It's also easy to install. But it's not as sleek as standing seam.
Metal Shingles: These are designed to mimic the look of traditional shingles, but they're made of metal. They're a good option if you want a more traditional look but still want the benefits of metal roofing.
Once you've installed the metal roof, you'll need to add a few finishing touches:
Fascia: This is the trim board that goes around the edge of the roof. It's important for giving your barn a finished look and protecting the roof from the elements.
Gutters and downspouts: These will help to direct rainwater away from the foundation of your barn.
Here are some extra tips for installing a metal roof:
Use the right fasteners: Don't just grab any old screws! Make sure you use fasteners that are designed for metal roofing. They'll need to be corrosion-resistant and long enough to penetrate the sheathing and framing.
Overlap the panels properly: You need to overlap the panels enough to ensure a watertight seal. The amount of overlap will depend on the type of metal roofing you're using.
Be careful around the edges: You'll need to pay extra attention to the edges of the roof, especially around the eaves and rakes. Use flashing to create a waterproof seal.
Alright, so you've got your metal roof on, and your pole barn is looking pretty great! Now, here are a few things to keep in mind:
Maintenance: Even though metal roofing is durable, it still needs some basic maintenance. Inspect it regularly for any signs of damage or corrosion. You'll also want to keep the roof clean, removing any debris that might build up.
Insulation: Metal roofs can get hot in the summer and cold in the winter. If you're planning on using the barn year-round, you'll need to think about insulating it. You can add insulation to the walls and roof to help keep the temperature inside more comfortable.
Ventilation: If you're going to have a workshop or garage in your barn, you'll need to think about ventilation. This will help to prevent moisture build-up and keep the air fresh.
And remember, this is just a basic guide. Building a pole barn is a pretty involved process, and it's always a good idea to consult with a professional if you're not sure about anything. But with some planning and careful attention to detail, you can build a sturdy and durable pole barn with a long-lasting metal roof. You'll be able to store all your stuff, work on your projects, or just enjoy the space for years to come!
Sunday, November 10, 2024
Step-by-step guide to building an affordable 8x10 shed
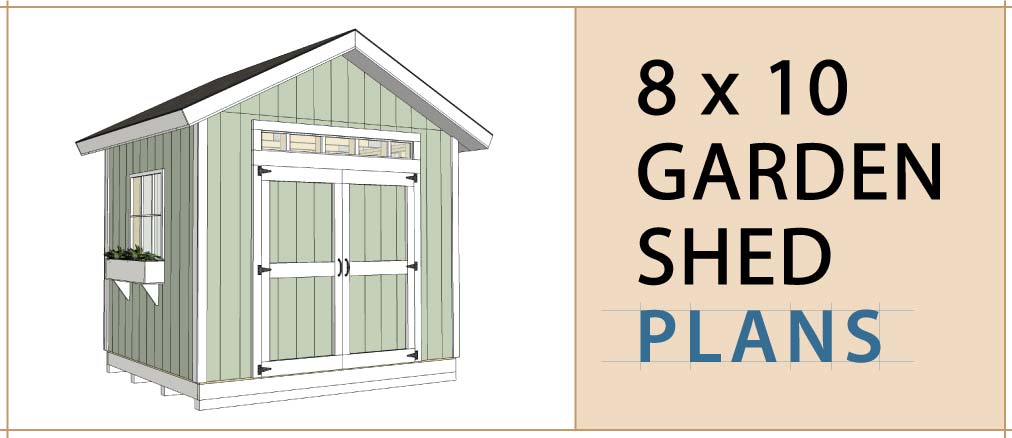
Hey there, fellow DIY enthusiast! Want a shed, but don't want to break the bank? You're in the right place! Building an 8x10 shed is a great way to get extra storage space without emptying your wallet. We're going to walk through the process, step by step, keeping it as simple and affordable as possible.
Let's Get Started!
First things first, let's talk about what you'll need. Here's a list of materials, tools, and supplies:
Materials:
Lumber: You'll need pressure-treated lumber for the foundation and floor joists, and standard framing lumber for the walls and roof.
Sheathing: Plywood or OSB for the walls and roof.
Roofing: Choose from asphalt shingles, metal roofing, or even a cool membrane roof.
Windows and Doors: Decide on the size and number of windows and doors you need.
Siding: Choose a siding material that suits your budget and style.
Paint or Stain: For a finished look, paint or stain the exterior and interior of your shed.
Hardware: Nails, screws, brackets, hinges, etc.
Tools:
Circular saw: For cutting lumber.
Tape measure: For accurate measurements.
Level: To ensure your shed is perfectly level.
Hammer: For hammering nails.
Drill/Driver: For driving screws and drilling holes.
Safety Glasses: To protect your eyes.
Work Gloves: For safe handling of materials.
Step 1: Planning and Design
Before you even step foot in a lumber yard, take some time to plan your shed.
Location: Choose a spot with good drainage and access for your tools and materials.
Foundation: Decide on the type of foundation: concrete slab, gravel pads, or even just a simple wooden frame.
Style: Think about the overall style of your shed. Do you want a traditional, modern, or rustic look?
Door and Window Placement: Plan where you want your doors and windows for easy access and light.
Step 2: Building the Foundation
Now it's time to lay the groundwork for your shed. This is where your foundation type comes into play. Here's how to build a simple wooden frame foundation:
1. Mark the area: Use stakes and string to mark out the dimensions of your shed.
2. Set the foundation posts: Dig holes for your foundation posts and set them in concrete. Make sure the posts are level and spaced according to your design.
3. Connect the posts: Use pressure-treated lumber to connect the posts and create the frame for your shed.
Step 3: Building the Floor
The floor is the base of your shed, so it's important to get it right.
1. Lay the joists: Install the floor joists over the foundation posts, making sure they're spaced 16 inches apart. Attach them securely to the posts.
2. Add subfloor: Lay plywood or OSB sheathing over the joists to create the floor. Make sure the sheets are staggered for added strength.
Step 4: Building the Walls
Time to get those walls standing tall!
1. Construct the wall frames: Cut and assemble the wall frames using your framing lumber.
2. Install the sheathing: Attach plywood or OSB sheathing to the wall frames.
3. Erect the walls: Carefully lift and secure the wall frames onto the floor, making sure they're plumb and level.
Step 5: Building the Roof
The roof is the final layer of your shed. It's time to get creative!
1. Create the roof trusses: Build your roof trusses according to your chosen roof design. There are plenty of online resources that can guide you.
2. Install the trusses: Place the trusses onto the walls, making sure they are level and securely attached.
3. Add roof sheathing: Cover the roof with plywood or OSB sheathing.
Step 6: Finishing Touches
It's time to add those finishing touches that will turn your shed from a skeleton to a beautiful, functional space.
1. Install siding: Choose your siding material and install it over the sheathing.
2. Install doors and windows: Mount the doors and windows in their designated spots.
3. Add roofing: Securely install your chosen roofing material.
4. Paint or stain: Give your shed a fresh coat of paint or stain to protect it and enhance its appearance.
Tips for Saving Money:
Buy lumber in bulk: This can save you money, especially on larger projects.
Look for deals: Check online marketplaces and local lumber yards for discounted materials.
Reclaim materials: If you're feeling crafty, use reclaimed wood or other materials to add a unique touch and save on costs.
Do the work yourself: Hiring contractors can be expensive, so try to do as much of the work yourself as possible.
Conclusion:
Building your own 8x10 shed can be a rewarding experience! Not only will you save money, but you'll also gain valuable skills and have a sense of accomplishment. Remember, take your time, plan carefully, and don't be afraid to ask for help if needed.
With this guide and a little elbow grease, you'll be enjoying your very own affordable shed in no time! Happy building!