Monday, November 11, 2024
DIY Pole Barn: How to Create a Low-Cost, High-Quality Building

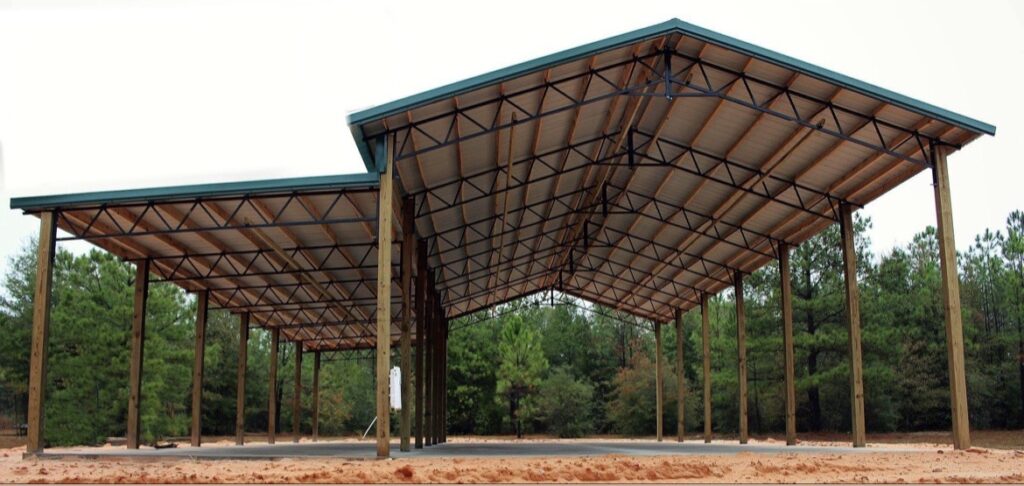
A pole barn, also known as a post-frame building, offers a versatile and cost-effective solution for a variety of purposes, including storage, workshops, garages, and even living spaces. The construction method, relying on sturdy posts embedded in concrete and a lightweight, pre-engineered frame, allows for a quick build with a minimal need for specialized labor. This guide will delve into the comprehensive process of building a DIY pole barn, equipping you with the knowledge and resources to create a durable and high-quality structure within your budget.
I. Planning & Preparation
1. Design & Planning:
Purpose: Clearly define the purpose of your pole barn. This will dictate the necessary dimensions, features, and materials.
Building Codes: Consult local building codes to ensure your project complies with regulations.
Site Analysis: Determine the ideal location on your property, considering factors like drainage, sunlight, and accessibility.
Design & Layout: Sketch your desired layout, including the dimensions of walls, doors, windows, and any other features. Consider the placement of electrical outlets, plumbing, and ventilation.
Permitting: Obtain necessary permits from local authorities before beginning construction.
2. Materials & Tools:
Foundation & Posts: Concrete footings and pressure-treated lumber for the posts.
Frame & Roof: Engineered trusses, plywood sheathing, and roofing materials.
Walls & Siding: Choose from various options like OSB, plywood, or metal siding.
Windows & Doors: Select suitable sizes and styles for your design.
Insulation & Vapor Barrier: Consider adding insulation and a vapor barrier for energy efficiency.
Hardware & Fasteners: Include screws, nails, brackets, and other essential hardware.
Tools: Basic tools like hammers, saws, screwdrivers, drills, levels, and measuring tapes are essential.
II. Construction Process:
1. Foundation:
Excavation: Dig holes for the concrete footings, ensuring they are deep enough to reach frost-free soil.
Forms: Build forms around the holes to create the desired footing dimensions.
Rebar: Install rebar within the forms for reinforcement.
Concrete Pouring: Carefully pour concrete into the forms, ensuring it is properly compacted.
Curing: Allow the concrete to cure properly before proceeding to the next step.
2. Post Installation:
Post Preparation: Cut and treat the post lumber with a sealant to prevent rot.
Setting Posts: Position the posts in the concrete footings and ensure they are plumb and level.
Temporary Bracing: Brace the posts with temporary supports until the concrete fully cures.
3. Framing:
Truss Installation: Raise and secure the pre-engineered trusses to the posts, creating the roof frame.
Wall Sheathing: Attach plywood or OSB sheathing to the posts, creating a solid wall structure.
Window & Door Openings: Cut openings in the sheathing for windows and doors.
4. Roofing:
Roof Sheathing: Install plywood or OSB sheathing on top of the trusses.
Underlayment: Lay down felt underlayment for water resistance.
Roofing Shingles: Install your chosen roofing material, following manufacturer instructions.
Venting: Install roof vents to ensure proper ventilation and prevent moisture buildup.
5. Siding & Finishing:
Siding Installation: Apply your chosen siding material, adhering to manufacturer guidelines.
Windows & Doors: Install windows and doors, ensuring proper sealing and weatherproofing.
Interior Finishing: Finish the interior walls with drywall, paint, or other desired materials.
Electrical & Plumbing: Install electrical wiring and plumbing fixtures as needed.
III. Cost-Saving Strategies:
DIY Labor: By doing most of the work yourself, you can significantly reduce labor costs.
Material Sourcing: Shop around for the best prices on materials, considering bulk purchases and sales.
Basic Design: Opt for a simple design with fewer features to minimize material requirements.
Recycled Materials: Consider using recycled materials for certain components like siding or roofing.
Alternative Insulation: Explore affordable insulation options like fiberglass batts or blown-in cellulose.
IV. Quality Considerations:
Foundation & Posts: Choose high-quality concrete and pressure-treated lumber for a long-lasting structure.
Trusses: Ensure your trusses are designed and engineered by a qualified professional.
Roofing & Siding: Invest in durable and weather-resistant roofing and siding materials.
Proper Ventilation: Implement proper ventilation throughout the structure to prevent moisture buildup.
Maintenance: Regular maintenance is crucial for preserving the longevity and quality of your pole barn.
V. Additional Considerations:
Accessibility: Plan for accessibility features if your pole barn will be used for storage or as a workshop.
Climate: Consider your local climate when selecting materials and designing your pole barn for optimal performance.
Future Expansion: Plan for the possibility of future expansion by leaving room for additional posts or bays.
VI. Conclusion:
Building a DIY pole barn can be a rewarding experience, allowing you to customize your space to your specific needs and budget. By carefully planning, sourcing materials wisely, and adhering to proper construction techniques, you can create a durable, high-quality structure that will serve you for years to come.
Remember, safety should always be a top priority. Wear proper safety gear and follow manufacturer guidelines for all tools and materials. Seek professional guidance when necessary, and don't hesitate to ask for help from experienced individuals. With dedication and proper planning, you can successfully build a DIY pole barn that meets your unique requirements and becomes a valuable asset to your property.
No comments:
Post a Comment