Thursday, November 21, 2024
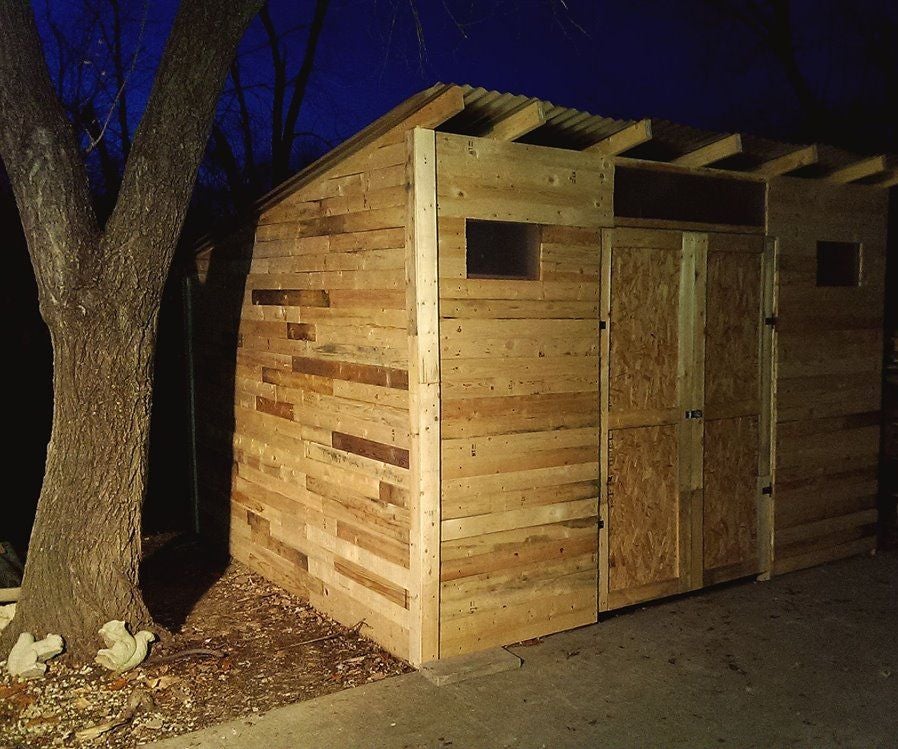
DIY Pallet Shed: Build a Sturdy Shed for Your Garden with Pallets

DIY Pallet Shed: Build a Sturdy Shed for Your Garden with Pallets
Hey there, fellow DIY enthusiasts! So you're thinking about building a shed, huh? And you're eyeing those free pallets sitting around? Fantastic! You're in for a treat. Building a shed from reclaimed pallets is a fantastically rewarding project that's surprisingly easier than you might think (and way cheaper than buying a pre-made one!). This guide will walk you through the process, offering tips and tricks to ensure you end up with a sturdy and functional garden shed you'll be proud of.Planning Your Pallet Shed Project
Before you even think about grabbing a hammer, some serious planning is essential. This isn't just slapping some pallets together; we're building something that'll last!Choosing Your Pallets
Not all pallets are created equal. You'll want to carefully select your pallets. Look for:- Heat-treated pallets: These are marked with "HT" and are generally safer to use for construction as they haven't been treated with harmful chemicals.
- Solid wood pallets: Avoid pallets with significant rot, warping, or broken boards. The sturdier the pallets, the sturdier your shed.
- Consistent size: Aim for pallets of a similar size to make construction easier. Measuring several pallets beforehand and choosing similar ones will save headaches down the line.
Designing Your Shed
Think about the size and features you need. How much storage space do you require? Do you need shelves? A workbench? A door? Sketch out a simple plan â€" even a rough drawing on a napkin will help visualize your project. Consider the footprint of your shed and whether you'll need to obtain any permits for its placement (check local regulations). My personal recommendation? Start small. A smaller shed is easier to manage as your first pallet project. You can always build a bigger one later!Gathering Your Materials and Tools
Besides the pallets, you'll need some extra materials:- Wood screws: Lots of them! Different lengths are helpful for different applications.
- Strong wood glue:
- Metal brackets: These will add extra strength to the structure, especially at corners and joints.
- Plywood or OSB (Oriented Strand Board): For the roof and any additional sheeting you might need.
- Roofing material: Tar paper, shingles, or even heavy-duty plastic sheeting will work.
- Door hinges and handle:
- Optional: Paint or stain for weatherproofing and aesthetics.
- Hammer
- Screwdriver (or drill/driver): A drill/driver is a HUGE time-saver.
- Measuring tape
- Level
- Saw (circular saw or hand saw): For cutting pallets and additional wood.
- Safety glasses and work gloves: Always prioritize safety!
Building Your Pallet Shed: Step-by-Step
Okay, let’s get our hands dirty! Remember, this is a general guide; adjust the steps to match your specific design.Constructing the Frame
Start by assembling the base frame. This might involve laying out pallets to create the desired footprint and securing them together using wood screws and glue. Reinforce the corners using metal brackets for extra strength. You'll want your base to be perfectly level! Use a level constantly throughout this stage. No one wants a leaning shed!Adding the Walls
Once the base is solid, it’s time to build the walls. This might involve using additional pallets or constructing walls from individual pallet boards if you want a more finished look. Again, secure everything firmly with screws and glue, reinforcing with metal brackets where necessary.Building the Roof
The roof is a crucial part. You'll need to create a sturdy frame, typically using more pallets or additional lumber. Once the frame is up, you can add your plywood or OSB sheeting and then your chosen roofing material. Ensure the roof has a sufficient slope to allow for water runoff.Installing the Door
Measure, cut, and install your door. This step requires careful measuring and precise cutting. Take your time and make sure it fits perfectly! Attach hinges securely and install the handle.Finishing Touches
Once the main structure is complete, you can add any finishing touches. This might include adding shelves, a workbench, painting or staining the shed, and sealing any exposed wood to protect it from the elements.Tips for Success
- Clean your pallets: Remove any debris, nails, or loose wood before starting construction.
- Pre-drill holes: This prevents the wood from splitting when you screw it together.
- Use plenty of glue: Glue strengthens the joints and makes the structure more durable.
- Check your work regularly: Ensure everything is level and square as you go.
- Don't be afraid to ask for help: If you get stuck, ask a friend or family member for assistance.
Commonly Asked Questions
Q: How long does it take to build a pallet shed?
A: It depends on the size and complexity of your shed, but you can expect to spend anywhere from a weekend to several weekends on the project.
Q: How much does it cost to build a pallet shed?
A: The cost is primarily determined by the additional materials you need (wood screws, brackets, plywood, roofing, etc.) The pallets themselves are usually free or very inexpensive.
Q: Are pallet sheds durable?
A: With proper construction and maintenance (like sealing the wood), a pallet shed can be surprisingly durable and last for many years.
Q: What kind of permits do I need?
A: This depends entirely on your location and local building codes. Check with your local council or planning department before you start building.
Q: Can I use treated pallets?
A: While possible, it's generally recommended to avoid using chemically treated pallets due to potential health hazards. Heat-treated pallets ("HT") are a much safer option.
And there you have it! Building a pallet shed is a rewarding project that combines creativity, resourcefulness, and a good dose of elbow grease. Remember to always prioritize safety, plan carefully, and enjoy the process. Happy building!
No comments:
Post a Comment